
|
Flubaroo is a free tool that helps you quickly grade multiple-choice or fill-in-blank assignments.
|
Step 1: Create an Assignment
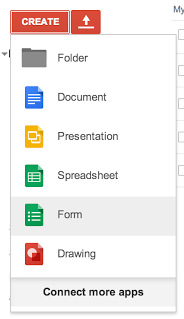
Sign into your Google docs account, and create a new "Form". Forms are multiple-choice style surveys that you can share with anyone (e.g. via email). Every time someone fills out the form, their responses are placed as a new row in an accompanying spreadsheet.
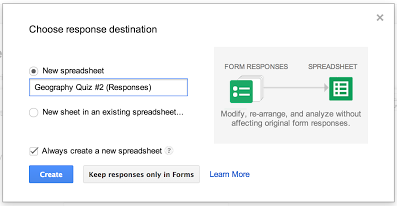
Once you've created a new form, just add in the questions for your assignment, and choose "New Spreadsheet" as the destination.
Sign into your Google docs account, and create a new "Form". Forms are multiple-choice style surveys that you can share with anyone (e.g. via email). Every time someone fills out the form, their responses are placed as a new row in an accompanying spreadsheet.
Once you've created a new form, just add in the questions for your assignment, and choose "New Spreadsheet" as the destination.
Be sure to include the check box to collect student ID and only allow people with EWSDMAIL to take the Quiz to identify the student (such as first name, last name, and student id). This will allow you to email each student their grade.
Once done entering questions, save and close the form.
Once done entering questions, save and close the form.
Step 2: Create an Answer Key
Open up the form as a student would, fill it out with the correct answers and submit it. Be sure to enter your name too, so you can identify this entry later on as the answer key.
To get to the live form, you can click the "View Live Form" button in the form editor, or choose "Form > Go to live form" from within the destination spreadsheet.
Step 3: Assign It!
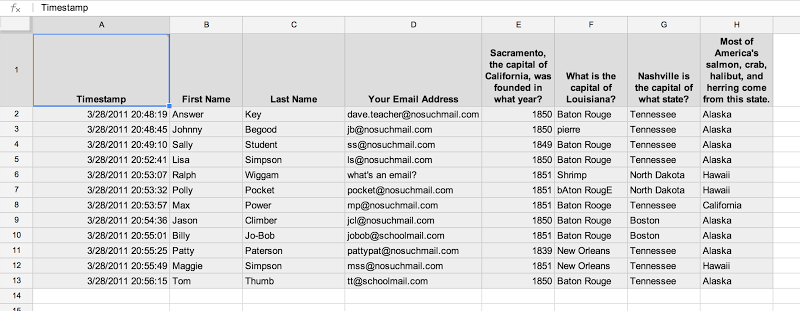
Post a link to the form on your class website, or email the link to your class. As students submit, their responses will show up in the spreadsheet, which will look something like this:
Open up the form as a student would, fill it out with the correct answers and submit it. Be sure to enter your name too, so you can identify this entry later on as the answer key.
To get to the live form, you can click the "View Live Form" button in the form editor, or choose "Form > Go to live form" from within the destination spreadsheet.
Step 3: Assign It!
Post a link to the form on your class website, or email the link to your class. As students submit, their responses will show up in the spreadsheet, which will look something like this:
Step 4: Grade It!
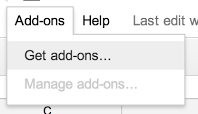
Open the spreadsheet associated with the form.
From the "Add-ons" menu, click "Get Add-ons". You'll be presented with the Add-Ons store, where you can find and install a number of useful Add-ons.
To install Flubaroo, type "Flubaroo" in the search box at the top, or select the "Education" category from the drop-down on the left. Once you've found it, click the blue "+ FREE" button.
After clicking the button you'll be asked to authorize Flubaroo to run and access data in your spreadsheet, as well as send emails on your behalf (to students). Click the blue "Accept" button.
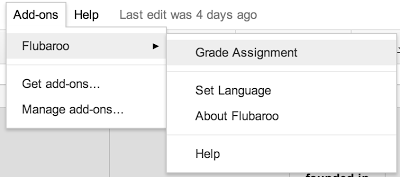
Once installed, you'll see a new menu called "Flubaroo" underneath themain "Add-ons" menu.
If you're ready to grade, just select "Grade Assignment" in this menu.
Flubaroo will ask you a few questions, such as:
If you're ready to grade, just select "Grade Assignment" in this menu.
Flubaroo will ask you a few questions, such as:
- If any questions should not be graded.
- Which questions are for the purpose of student identification
(e.g. name, student id, email). - Which submission should be used as the answer key.

Step 5: Review the Grades
The grades created by Flubaroo will be located in an adjacent worksheet called "Grades", as shown:
The grades created by Flubaroo will be located in an adjacent worksheet called "Grades", as shown:
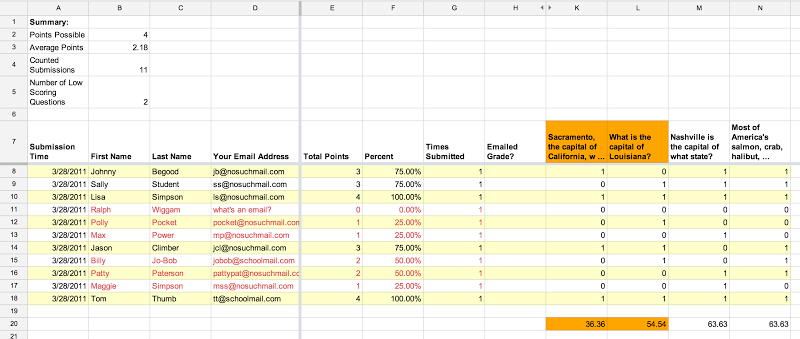
For each submission, Flubaroo will show which questions were answered correctly ("1" point"), which incorrectly ("0" points), and which were not graded. If less than 60% of students got a question correct, the question will be highlighted in orange to alert you. Additionally, students who scored less than 70% on the assignment will be highlighted in red.
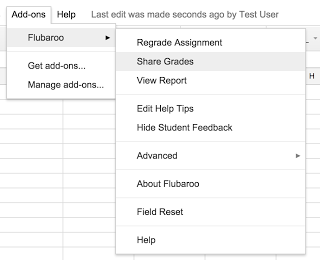
The Flubaroo menu will now offer you the ability to email each student their grades, view a summary report, or regrade the assignment. You might want to regrade the assignment if more students submitted answers, or if you want to throw out a question that most students got wrong.
If you choose to email each student their grade, you'll be given the option to include an answer key in the email. You can also include a short message to your students. The email sent to each student will include their total score, and their score for each question. Note: You will only be able to email students their grades if the original assignment had a question asking them for their email address.
If you choose to email each student their grade, you'll be given the option to include an answer key in the email. You can also include a short message to your students. The email sent to each student will include their total score, and their score for each question. Note: You will only be able to email students their grades if the original assignment had a question asking them for their email address.
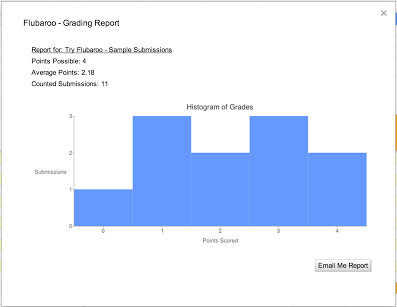
Choosing "View Report" shows you a summary report of the grading. The report includes the distribution of grades (a histogram), and a button to email yourself a copy of the report.